Welcome to your comprehensive guide on DIY artificial grass installation, which was brought to you by the experts at Arturficial Wholesale in the Phoenix area. Whether you’re looking to transform your backyard or front yard with lush, vibrant fake grass, this article breaks down everything you need to know to achieve a flawless synthetic turf lawn. From selecting the right materials to mastering the installation process and ensuring long-lasting durability, we’ve got you covered.
Artificial grass has become increasingly popular for homeowners seeking a low-maintenance, water-saving alternative to natural lawns. With the right approach, installing synthetic turf yourself is achievable and rewarding. This
through each step, sharing professional tips and tricks to help you get the best results on your DIY synthetic grass installation project.
Before diving into your DIY artificial turf installation, it’s essential to determine the materials and tools you’ll need to complete the project successfully. Proper planning saves time, money, and potential headaches down the road.
Having all these materials and tools on hand before starting your project ensures a smooth workflow. If you’re in Phoenix or nearby, Arturficial Wholesale can deliver everything you need directly to your door.
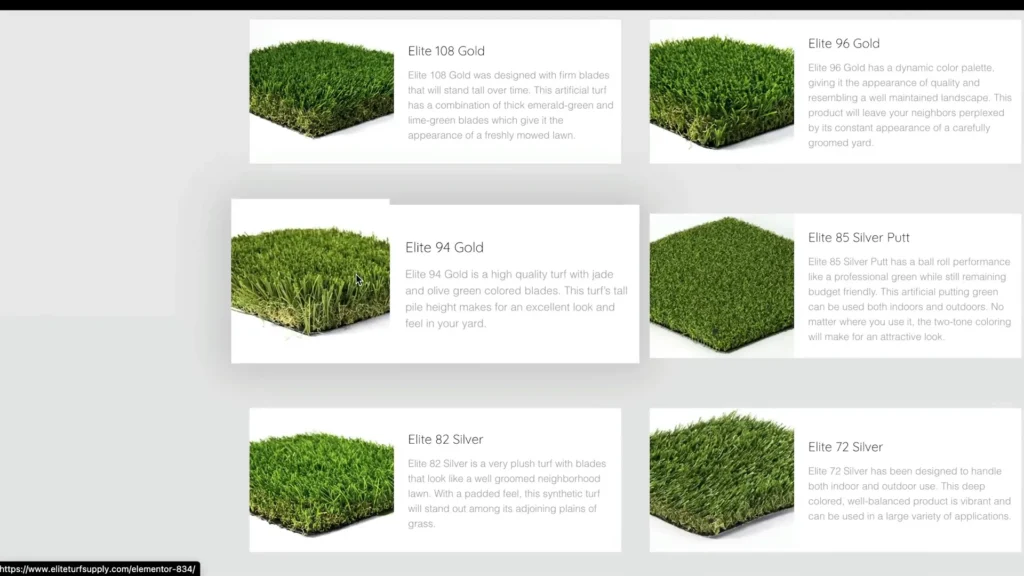
The right artificial grass is crucial for a natural look and long-lasting performance. At Arturficial Wholesale, we stock several popular synthetic turf options tailored for residential use.
When selecting your turf, consider factors like pet-friendliness, foot traffic, and the look you want to achieve. Our team at Arturficial Wholesale can guide you to the best fit for your project.
An often overlooked but critical step in synthetic turf installation is checking for window reflections, which can cause “turf burn.” This happens when sunlight reflects off windows and heats a concentrated spot on the synthetic grass, causing it to melt or discolor.installation services
To avoid this, inspect your yard at different times of the day, especially if your windows face east or west. If you notice intense reflections, consider applying window tinting films such as Contravision, which reduces glare and heat transmission.
Arturficial Wholesale recommends addressing window reflections before installation to protect your investment and keep your synthetic grass looking pristine.

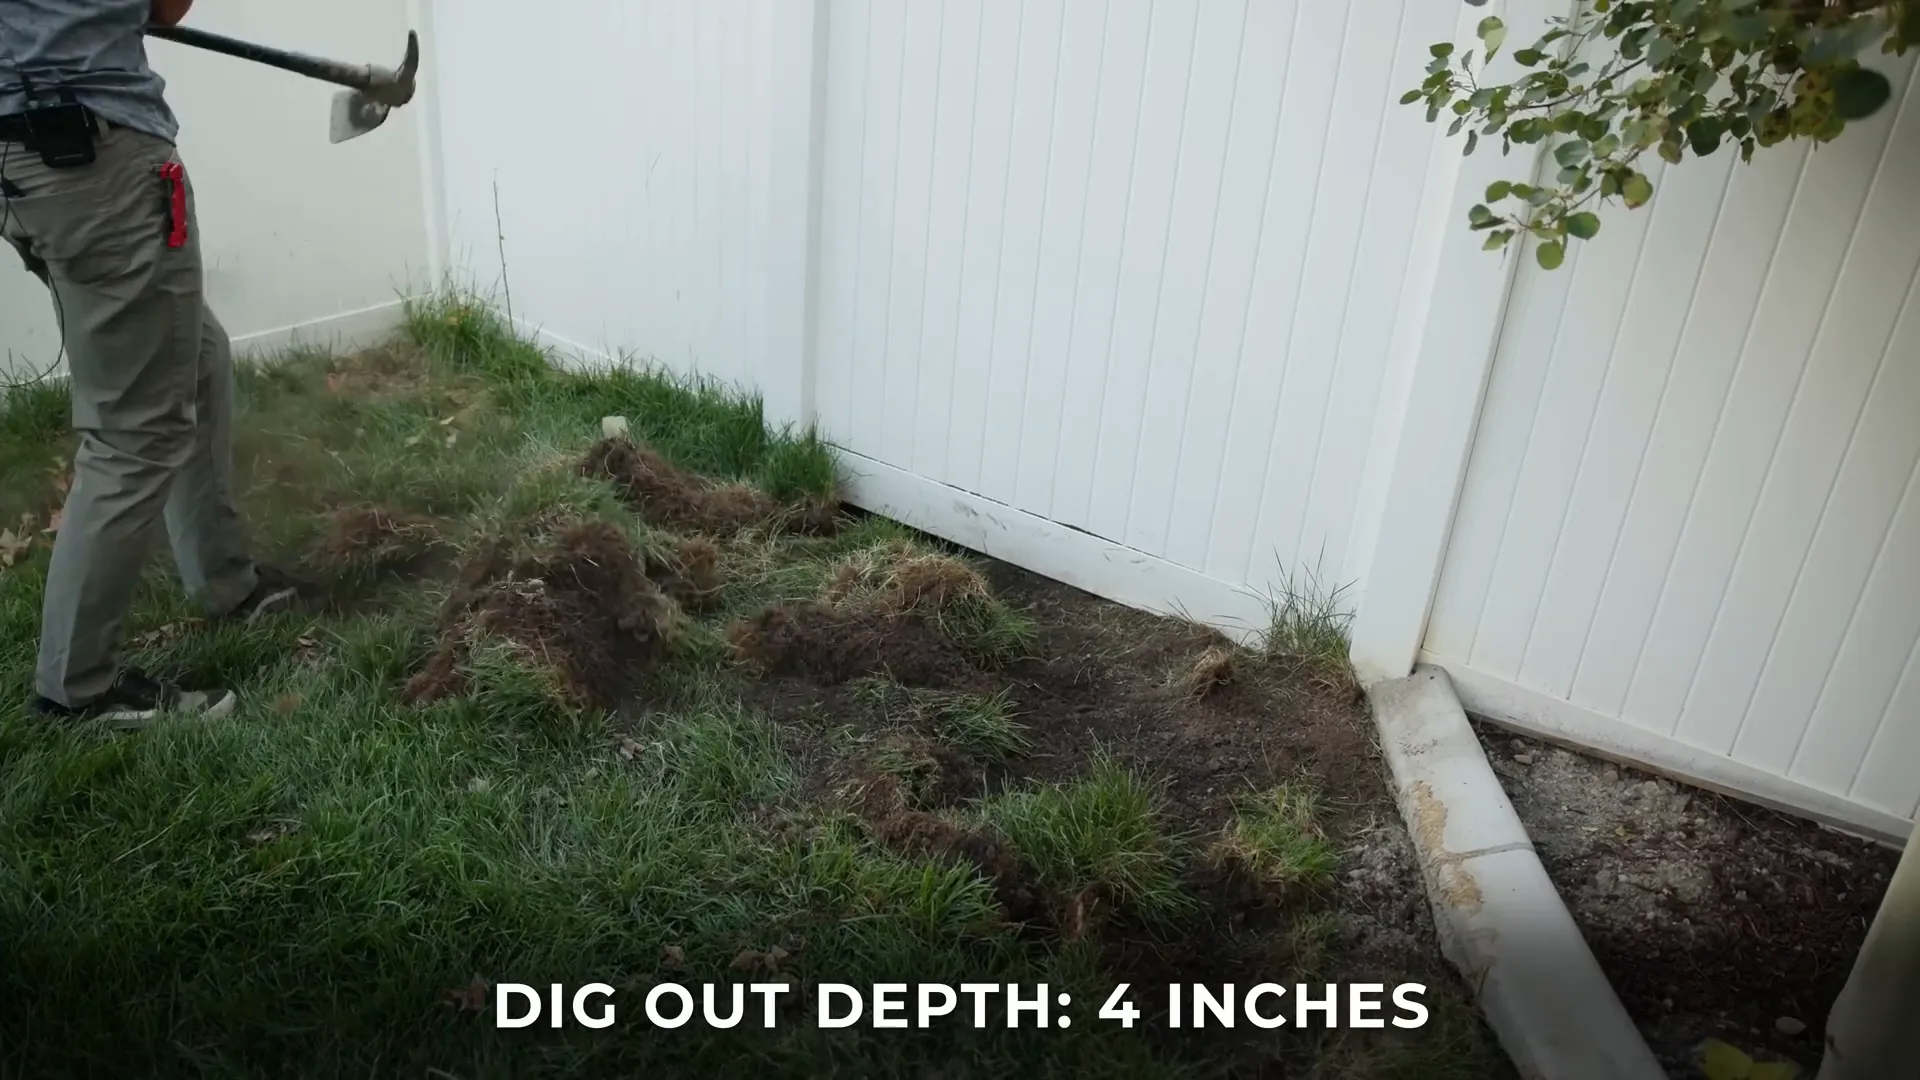
Once you’ve planned and prepared, the next major step is the dig-out process. Typically, you’ll remove about four inches of existing sod to make room for the base material that supports your synthetic turf.
Manual tools like pickaxes and shovels will suffice if your yard is small or has limited access. For larger areas or better accessibility, renting equipment such as a skid steer or mini-excavator can speed up the process.
Essential considerations during excavation:
During excavation, you may encounter sprinkler systems. Removing all PVC piping is best to avoid future water leaks that could undermine your base. If removal isn’t possible, cap the lines securely and recompact the soil after trenching.
The base is the foundation of your artificial grass lawn and arguably the most important part of the installation. How well you prepare your base directly affects the final appearance and longevity of your turf.
We recommend using blended borrow for your base. Unlike typical road base, blended borrow contains squeegee mixed into the aggregate, making it permeable and excellent for drainage when compacted properly (targeting 96% compaction). You can find more information on this topic at
.
If blended borrow isn’t available, a combination of:
will also work effectively.
Remember, a smooth, well-compacted base ensures your synthetic grass looks flawless and prevents future sinking or unevenness.

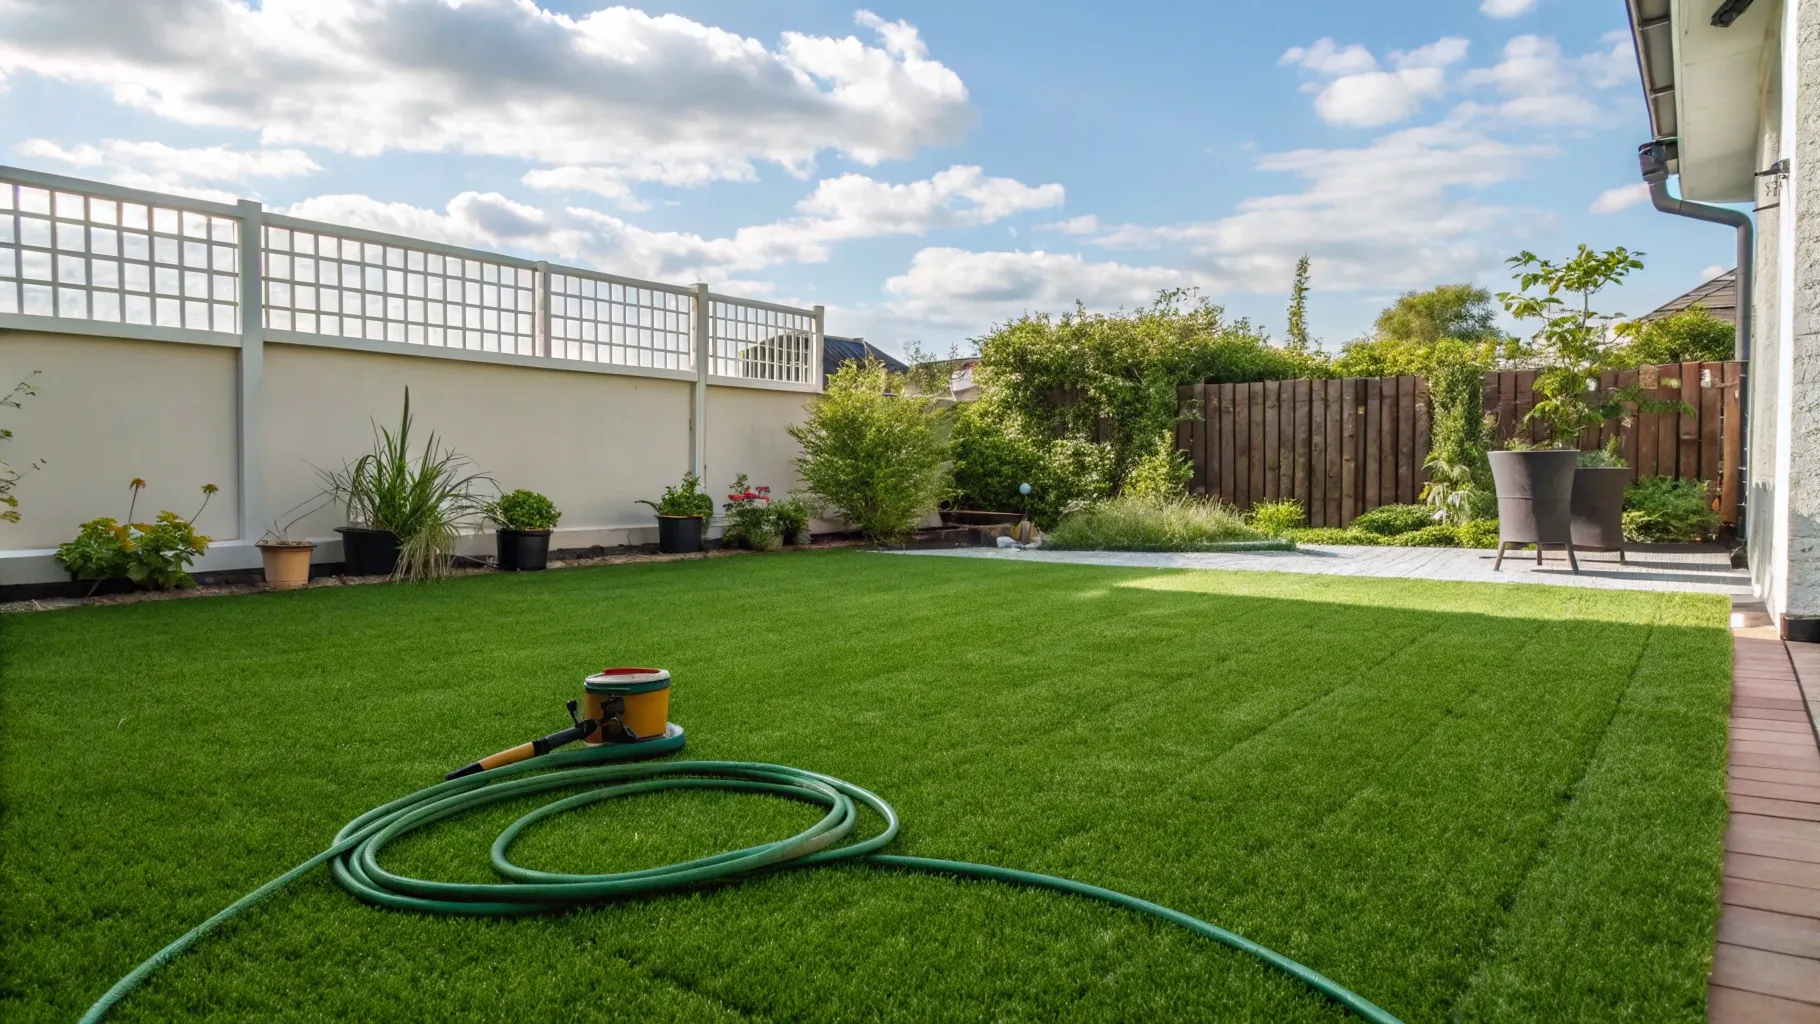
With your base ready, it’s time to roll out your synthetic turf. Before installation, unroll the turf and let it sit in the sun for a while. Most artificial grass is made with polyurethane backing that expands in warmth and contracts when cold. This step helps reduce wrinkles and waves later on.
Artificial grass has a grain direction similar to real grass, affecting how it looks under light. The “up grain” shows the blades as they naturally grow, while the “down grain” can look shiny or plasticky.
For the best aesthetics, orient the grain toward the primary viewing area — usually towards the house or main entrance.
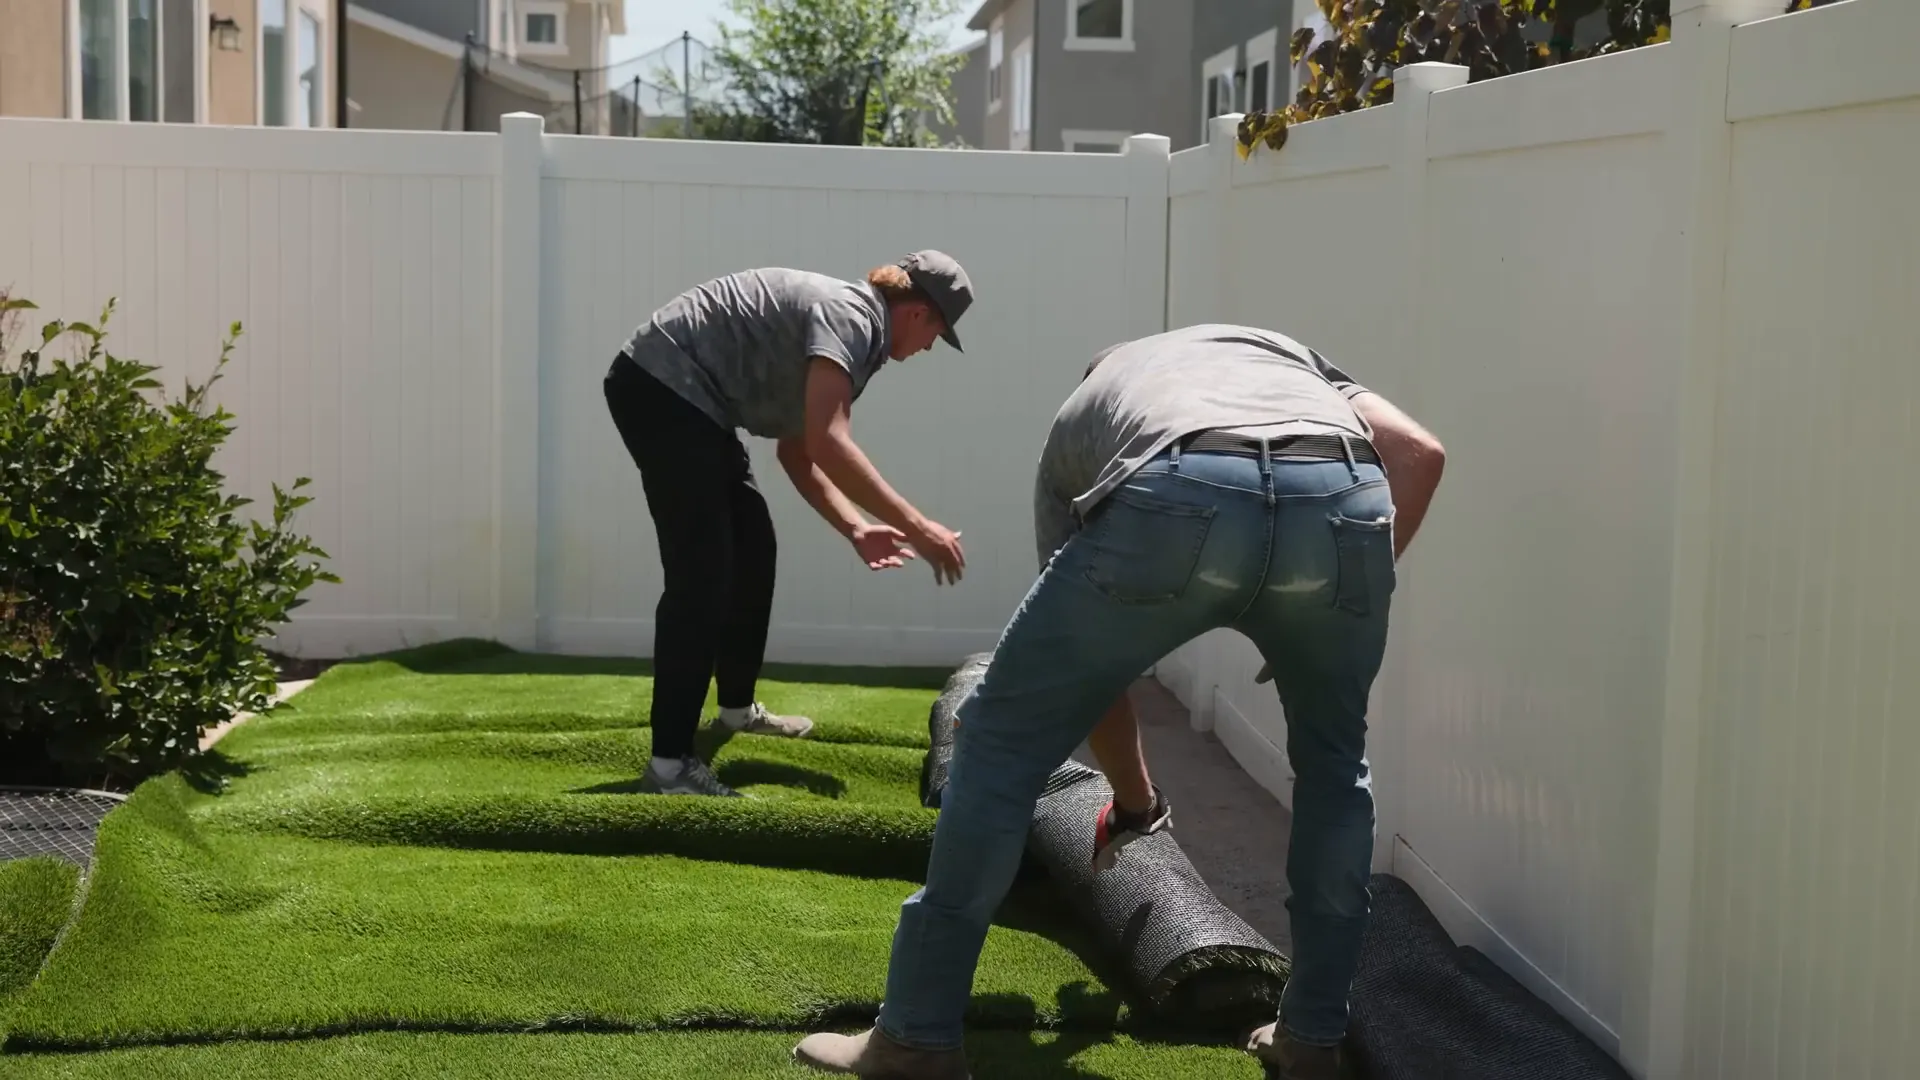
Each turf roll is typically 15 feet wide. When joining multiple rolls, overlap about six inches to create an “S” seam or invisible seam. This technique helps hide the seam and creates a smooth, continuous lawn appearance.
Use sharp utility blades for cutting, and rotate blades frequently to avoid frayed edges. Seam tools help guide precise cuts, with the curve of the tool pointing away from the seam to be trimmed.
Leave turf slightly longer than needed to avoid gaps, trimming back once the pieces are aligned perfectly.

Stretching synthetic grass ensures it lays flat and wrinkle-free. There are various methods, but a common technique involves: installation services.
When nailing, avoid driving nails through the grass blades to prevent dimpling. Instead, place nails between stitch rows, lifting the turf blades to expose the backing before nailing.
To prevent bubbles or visible seams, maintain a tight fit by leaving about an eighth to a quarter-inch gap between turf edges and hard surfaces like cement.

Join turf seams with seam tape placed underneath, and apply a high-quality adhesive on top of the tape for strong bonding. Avoid getting glue on the grass blades, as it creates a mess.
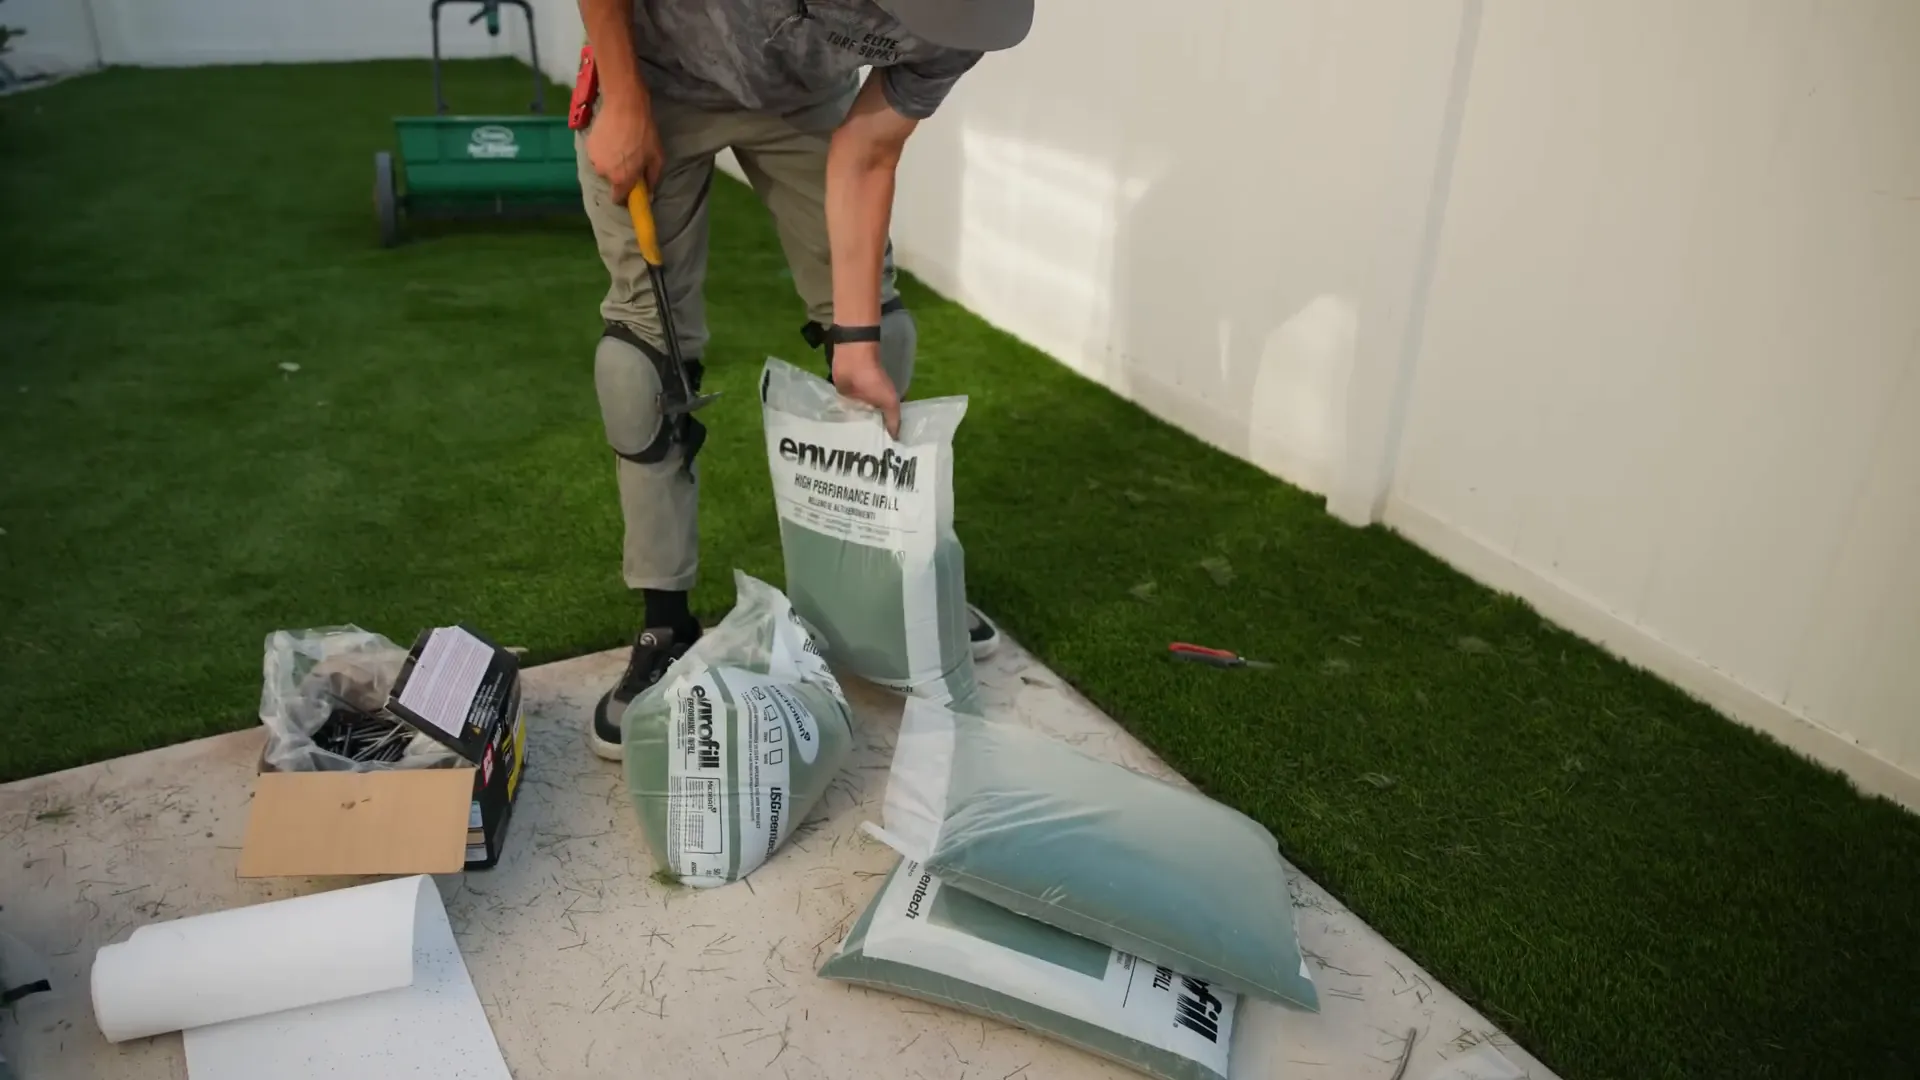
To secure the seam and help the glue set, place bags of infill on top, carefully lifting blades around the seam to prevent glue contact.
Use six-inch galvanized nails with small heads that fit between stitch rows to secure turf edges without damaging blades. Nail spacing varies:
Drive nails at an angle, then straighten them up using a hammer claw to avoid crushing blades.
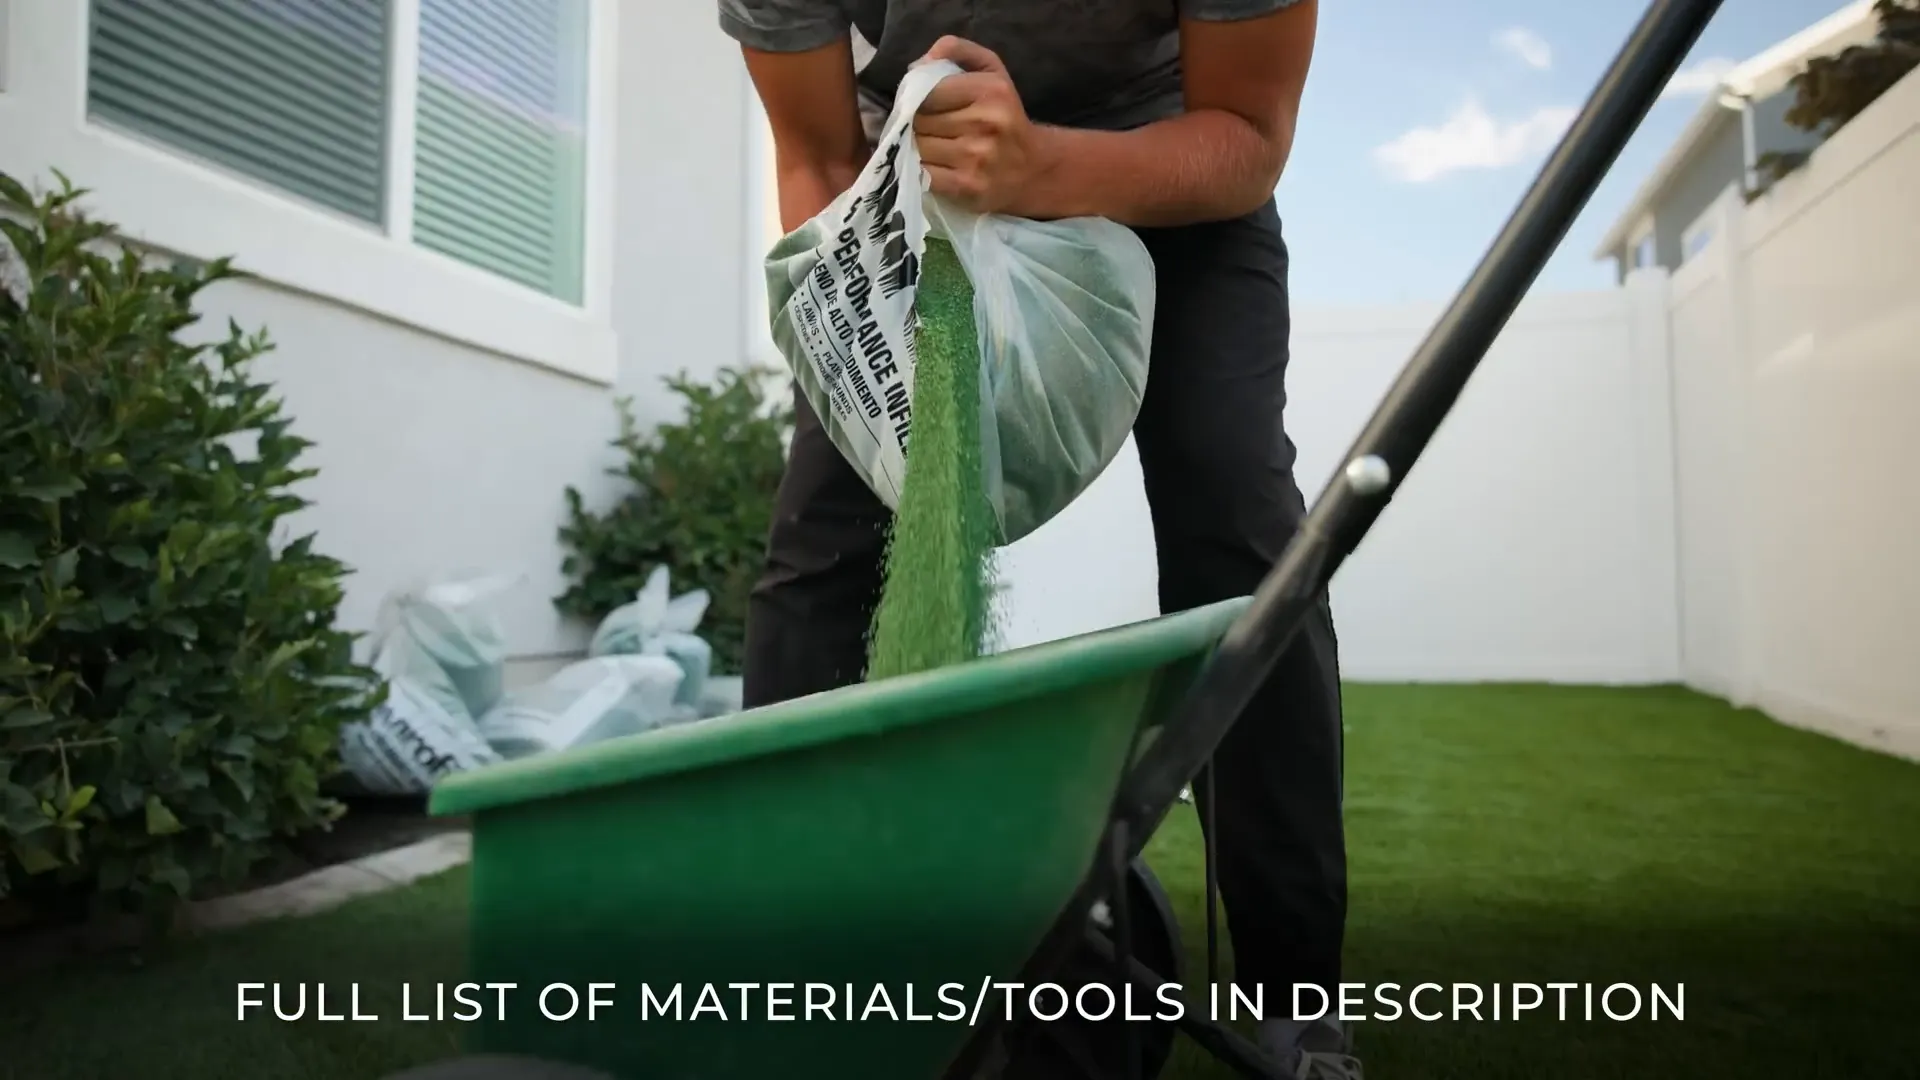
Infill is essential to weigh down your synthetic turf, support blade resilience, and enhance appearance. We recommend Envirofill for its antimicrobial and odor-eliminating properties — perfect for
and children.
Unlike regular silica sand, Envirofill prevents mold buildup and prolongs turf life.
Apply infill with a drop spreader, aiming for about two pounds per square foot, covering roughly 40% of the blade height. Spread horizontally and vertically for even coverage.
Fill edges by hand, especially near nails, to maintain a clean finish. After spreading, use a power broom or stiff bristle broom to brush infill into the turf backing and stand blades upright. Artificial turf can enhance the overall appearance of your landscape.
Finally, lightly water the turf to help settle the infill into place.
One of synthetic grass’s biggest advantages is its low maintenance. After installation, your lawn will stay green and beautiful year-round with minimal effort. For more information, you can visit understanding the benefits of turf vs natural grass for greens.
Maintenance mainly involves:
With proper installation and care, your artificial grass can last 15-20 years or more.
Based in the Phoenix area, Arturficial Wholesale offers premium artificial grass and all the supplies necessary for your DIY synthetic grass installation. We provide expert guidance, quality products, and delivery services to help you achieve a stunning, water-saving lawn.
From selecting the perfect turf to offering installation tips and tools, we’re your trusted partner in transforming your outdoor space with fake grass that looks and feels natural.
A: Absolutely! With the right tools, materials, and guidance, DIY artificial turf installation is achievable. Following a step-by-step process ensures professional results.
A: High-quality synthetic turf installed properly can last 15 to 20 years or more with minimal maintenance.
A: Basic tools include shovels, pickaxes, wheelbarrows, a plate compactor, utility knives, carpet kickers, hammers, and turf scissors.
A: Check for window reflections that concentrate heat onto your turf. Using window tinting films can help reduce this risk.
A: We recommend Envirofill for its antimicrobial, odor-eliminating properties, and ability to help blades stand upright. Avoid regular silica sand as it can cause mold and wear.
A: For a 4-inch depth, use an aggregate calculator based on your yard’s square footage. It’s best to order extra to account for compaction and leveling adjustments.
A: Artificial turf can be installed over soil, concrete, or compacted base materials, provided the surface is properly prepped for drainage and leveling.
DIY artificial grass installation is a practical and rewarding way to upgrade your outdoor space with a beautiful, low-maintenance lawn. By following these eight detailed steps—from planning and excavation to base preparation, turf laying, and finishing touches—you can achieve a professional-quality synthetic turf lawn.
Arturficial Wholesale is here to support your project with premium products and expert advice. Reach out to us today and take the first step toward enjoying a lush, green yard all year round without the hassle of natural grass.
Artificial grass offers numerous benefits compared to traditional natural grass. It is low-maintenance, water-saving, and provides a consistent, lush appearance year-round. Arturficial Wholesale specializes in high-quality synthetic turf solutions.
From reducing the need for mowing, watering, and fertilizing to eliminating the hassle of mud and brown patches, artificial grass from Arturficial Wholesale is the perfect choice for homeowners seeking a convenient and eco-friendly landscaping option.
Before installing artificial grass, it's essential to properly prepare the area. This involves removing any existing vegetation, ensuring proper drainage, and creating a stable, level base. Arturficial Wholesale can provide guidance and support throughout the preparation process.
By following the right steps, you can ensure a smooth and successful installation, resulting in a beautiful, long-lasting synthetic lawn. Arturficial Wholesale is here to help you every step of the way.
Arturficial Wholesale offers a wide range of artificial grass options, allowing you to customize your outdoor space to suit your preferences. From lush, natural-looking textures to durable, pet-friendly varieties, our team can help you select the perfect turf for your needs.
Whether you're looking to create a child-friendly play area, a low-maintenance backyard oasis, or a stunning landscaping feature, Arturficial Wholesale has the expertise and products to bring your vision to life.
Caring for your artificial grass is a breeze compared to traditional lawns. Regular light brushing, occasional cleaning, and occasional infill replenishment are all that's required to keep your synthetic turf looking its best. Arturficial Wholesale can provide detailed maintenance guidance to ensure your investment lasts for years to come.
By following simple maintenance tips, you can enjoy the beauty and convenience of your artificial grass without the hassle of mowing, watering, or dealing with unsightly patches. Arturficial Wholesale is committed to helping you maintain a lush, vibrant lawn with minimal effort.